Showing posts with label First impression. Show all posts

9/17/13

Elf Disney Villains 2013 Collection: First Impression and Swatches!

If you've been reading my blog for a while then you might remember my excitement about the E.L.F. Villainous Villains Limited edition collection of products from last year. Well, they're back, baby, and better than ever. This year, E.L.F. has come out with FOUR villain look books (last year only three villains were featured- Maleficent, Cruella and The Wicked Queen. This year they added Ursula into the mix) as well as a collection of mini nail polishes. These products are all exclusive to walgreens. Last year, these were incredibly difficult for me to find. I searched high and low, went to about five different walgreens and finally had a very kind saleslady hold them for me until my husband could get down there, and he bought the very last ones! This year, I had zero trouble finding these babies! I walked into my local walgreens and spotted them as soon as I walked through the automatic doors!

 The look books were on display along with the nail polishes from Ellf, as well as other dsney villains themed products including false lashes from ardell, some hair things and some makeup bags. Let me tell you, I LOVE the disney villains, and it was so hard not to put one of everything in my cart!

But, I didn't. I pushed away the urge to buy everything and walked out with just one of the Disney Villains Look Books. I chose Ursula, since there wasn't a book available for her last year. And because I am a sucker for purple eyeshadows!

Elf Disney Villains Ursula Look Book

Isn't it just gorgeous! These books are quite a bit bigger than the ones from last year and feature white packaging with a gorgeous watercolor style image of the villain, in this case, Ursula. The packaging on this is so pretty and stylized. I love it! The book opens up in a sort of french door style (I am blanking on how else to describe it) and on either side of the products, there are written instructions on how to create both a day look, and a night look. These tutorials aren't as in-depth as the ones from the books last year, but useful nonetheless. I will be doing a separate post later on the looks that can be created, so be on the lookout for that!


Each of the look books comes with 1 eyelid primer, 6 eyeshadows, 1 brightening eyeliner, 1 liquid eyeliner, 1 mascara, 1 lip color ans 1 eyeshadow brush. Unlike last year's books, where the products were built in and couldn't be removed, these are all individual products that can be removed, which makes application super easy. Let's go over each of the products included in this book and look at them a little closer!

Elf Lengthening and Defining Mascara in black- This is the mascara from Elf's essential line. It can be purchased from their website for $1. I have never actually used this mascara before, so I am interesting in trying it out. The wand on this mascara is a regular bristle wand, not a rubberized one. Normally I prefer the rubberized wands, but we shall see. The head of this wand is also a bit smaller than some of the other wands I have tried previously, so that should be helpful in really getting in close to the lashline. I will have a full review on this mascara in an upcoming post.

Elf Brightening Eyeliner in Black- This is the eyeliner from Elf's essential line. It can be purchased from Elf's website for $1. That's for the full size. This is a mini travel size pencil. This isn't the blackest eyeliner ever, but it's nice and soft and easy to use. You can smudge it easily which makes it nice.

Elf Liquid Eyeliner in Midnight- I really like Elf's liquid eyeliner. This is from Elfs essential line as well and can also be purchased from their website for one dollar. I find that elf's liquid liners are easy to apply (well, as easy as liquid eyeliner is to apply) and dries relatively quickly, and lasts for quite a while! I don't find that it flakes on me, though I have heard that complaint from others. Still, it's a nice addition to the set.

Liquid liner in midnight, brightening eye liner in black


Elf Eyelid Primer- this is one of my holy grail products from Elf. It's just $1 from their essential line and it works just as well as higher end primers, on me. I find that it really helps to make colored eye shadows pop, which makes it a perfect addition to this colorful collection.

Elf professional eyeshadow brush- This is another one of my holy grail items from elf. This brush is fantastic, especially for it's price tag, which is $1 on Elf's website. It's a flat shader brush that is perfect for laying down color. I highly recommend this, and I am so excited to have an extra!

Elf Lip Color- This is an absolutely beautiful opaque lip cream. The one in the Ursula look book is a gorgeous mid-toned pink that isn't too muted or too bright. I found this lip color to be incredibly pigmented, long lasting (for a gloss) and very glossy. I love this!

Ursula Lip Color


 The eye shadows that are included in the Ursula Look Book are:

Coral- a shimmery pale lavender shade
Sea witch- a bright, matte fuchsia purple shade
Shell- a gorgeous green with a satin finish
Kiss the Girl- a super pigmented midtoned brown
Triton- a brighter mid-toned purple with a matte finish
Bewitched- a matte charcoal gray

Sometimes Elf's eyeshadows can be quite hit or miss, but I found, overall, the quality of these eyeshadows to be quite good! You can see, below, the swatches which are done on bare skin. I am certain that with an eye primer, these would really pop and be gorgeous! I apologize for my photos, which are looking quite washed out, but you can get an idea on pigmentation here. And just look at that gorgeous brown shade, called Kiss the girl.

Coral, Sea Witch, Shell
Kiss the Girl, Triton, bewitched


So there ya have it. That's the Ursula look book. I was so pleased to be able ti find this and add it to my collection of books from last year!

But wait! There's more!

My amazing husband got me a present. I was more than happy with my ursula book, so he got me my next favorite Disney Villain! Maleficent!!

Elf Disney Villains Maleficent Look Book

This book comes with all the same products as the Ursula one. Only differences are, the eye shadows and the lip color.


The Maleficent Look book comes with these eye shadows:

Flora- a cream color
Fauna- a sort of khaki color with a gorgeous sheen
Spell- a gorgeous shimmery green
Deep Sleep- a silvery light green shade
Thorns- a dark ruddy brown
Raven Black- a matte black

You can see in the photo below some are more pigmented than others and the black is a bit chalky but these can all be worked with!
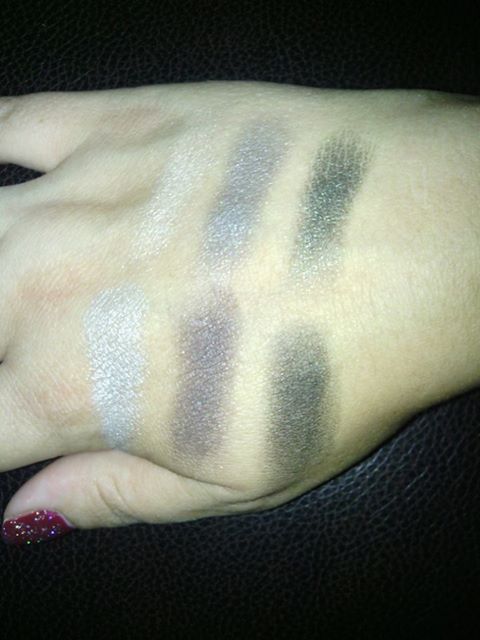
Flora, Fauna, Spell
Deep Sleep, Thorns, Raven Black 

And the Maleficent Lip Color is this gorgeous red:

Maleficent Lip Color


Overall I think, of the look books I have tried, this is a great collection! Heck, just the novelty alone makes this worth the $9.99 price tag to me, and the products are all product I will use!! I am going to try very hard to contain myself and not buy the other products in this collection, but its so hard!! Which Disney villain is your favorite? I would love to hear from you! Leave me a comment on this post, or else use the contact card below to get in touch!! Thanks for stopping by, guys, and be on the lookout for posts on the looks I plan to create with these sets!


9/11/13

Adventures in Stamping 2: full nail design, tips and tricks and a review of the bundle monster image plate #BM20!

Hey guys! I thought I would share with you my latest adventure in stamping! As you know, if you have been reading my blog or watching my videos lately, I have recently taken an interest in stamping designs on my nails. I have always been a huge nail polish enthusiast (which you can probably tell from my 200+ bottles of polish) but I have never been much of a nail art person. I don't have the steadiest hands, nor am I particularly creative, so stamping seemed like a good chance for me to try out new nail designs without needing the artistic gene!

So I dove in headfirst today and tried out my first official stamping mani! I have tried stamping before, in my first adventures in stamping post, but that was just playing around with stamps. I didn't intend to actually wear that manicure! This one I did. I had some mild success, so I thought I would share with you all my finished product, a mini review on the image plate I used to stamp, and then give you some tips and tricks and things I have learned through trial and error!

First, let's show you what I did! It's not at all perfect, but not bad for my first real try, in my opinion!

Wet n wild wild shine black creme stamped
on top of Sinful Colors Sugar Sugar
Wet n wild wild shine black creme stamped
on top of Sinful Colors Sugar Sugar


As you can see in the above photos, my right hand (top photo) looks MUCH better than my left hand (bottom photo) and that's because I learned as I went and made adjustments to my stamping technique. I started out with my left hand (bottom photo) and you can see that the stamp was not properly aligned. So while I was able to get a great polish transfer using the image plate that I chose (more on that later) my technique made this not so pretty.

I started out with a manicure that I had already been wearing for a couple days. This way I knew the polish was dry, and also, because I had already worn this mani for a while, I figured I wouldn't be too heartbroken if my stamping was a total failure and I had to take everything off. I applied my polish to the image plate (I used Wet n Wild Wild shine polish in Black Creme for my stamping polish) scraped the polish off, rolled my stamper over the image and then rolled the image on my nail. I found that doing it this way I got a good amount of pressure on the nail and was able to easily transfer the image, but it was difficult to see exactly where the image was going that way. So for my left hand, rather than rolling the image onto the nail, instead after I got the image onto the stamper, I held the stamper so that the image was face up and then I rolled the nail over the image. This made the image much easier to see and made aligning the image MUCH easier.

As for the actual image plate, I used the Bundle Monster image plate number BM20, and I used the diagonal striped image.

bundle monster image plate BM20
Unlike some of the other image plates I have experimented with, where the images didn't transfer well (perhaps because the design wasn't etched far enough into the plate?) this transferred beautifully onto my stamper. I had zero problems with transferring which made application a piece of cake! The main issue I had with this plate was that the image itself was too small.

I have my nails cute pretty short at the moment due to a sad break of my ring finger nail last week, so because of that the small image was large enough for the majority of my nails, but when it came to stamping my thumb, it was quite clear that these images simply aren't big enough for anyone who has longer nails, or average to large nail beds. You can see this clearly in my image below, where I stamped my thumb.

bundle monster image too small

While I am quite certain I can figure out a way to make these image plates work, be wary of this issue with some of the early bundle monster image plates. I am told that the later ones do not have this problem, as the images are bigger on those. But at least for this first set (BM1-BM21) the full nail images are too small for most nails.

Now that I have been playing around with stamping for a little while, I feel comfortable offering a few tips and tricks and things that have worked for me. Keep in mind I am no expert. I am very much a beginner! But through trial and error I have found a few handy tips that you might find useful!

Stamping Tips and Tricks for Beginners! 

Start with an old manicure. This is personal preference for me, but as a beginner, I want to make double darn sure that the polish that I am going to be stamping on top of is completely dry, so I like to stamp on a mani I have already been wearing for a day or two. You might not be as disappointed with messing up and having to take your polish off if you've already been wearing the polish for a while. Another reason this is a good idea is because if you're wearing a polish with a top coat, and you mess up your stamping, you can a lot of times remove just the stamped image with a bit of acetone, and leave the polish underneath in tact, because the top coat protects the polish beneath it! I managed to remove a faultily stamped image from my nails this way and do it over without having to paint my base color on again and lengthening the process!

Don't use that metal scraper! The stamper and scraper set that I purchased on amazon came with a metal scraper. While that's fine, I highly recommend that you skip the scraper and use an old gift card instead. The reason being is that the metal scraper can scratch your image plates. And also, the little holes of the metal scraper fill up with polish and make it difficult to clean. An old gift card or expired credit card does the trick and scrapes well, but doesn't scratch your plates and is easy to clean!

Try a different Angle! If you are having trouble lining up your image and it's stamping off center, or askew, like mine was above, try stamping from a different angle. If you're having a hard time seeing, try flipping the stamper over so that the image is facing up and then roll your nail over the image, rather than trying to roll the image over the nail. Or try different stamping techniques to get the image to stamp the way you want it! Don't be afraid to try a new angle or technique!

Acetone! I recommend that you use pure acetone for clean up both where the image might tranfser to the skin around your nails and on the plates themselves. The acetone makes clean up around your nails a breeze, and it evaporates quickly so it cleans your plates and tools of excess polish but doesn't leave your plates with ugly streaks! just be careful not to ruin your mani cleaning up, and make sure you moisturize your hands well when your mani is all dry, acetone is strong stuff!

Make clean up a breeze! Stamping can be a lot of fun, but boy, is it a messy process, especially for a beginner. Here's what I do to keep messes in check. First. I make sure to gather everything I need for stamping before I get started. That's just common sense! But I make sure to have Cotton swabs, acetone, and paper towels hands for cleaning up around my nails, cleaning my image plates, stamper and scraper, as well as for any spills. Then, what I do, is I do all of my stamping on top of an old magazine. I lay the magazine out and put my image plate on top of it and that way any polish that gets scraped off the plate gets on the magazine and not my table top. Then, when I am done I just tear off the page with the polish on it and throw it away, leaving a fresh clean page to use for next time!

use an old magazine under your work station
for easy clean up! Just tear the page out
and toss it when you're done! 

Try, Try again! Lastly, don't give up! Stamping can be a pain at first, and you might get frustrated, but you will definitely learn new tips and tricks and things as you go and each time you try stamping it will get easier. You will be able to do a ton of different designs easily and affordably! It's worth the frustration!


So there ya have it! My second adventure in stamping! I am loving stamping so far even though I am obviously no master! It's fun to try new designs and techniques and I think it will get easier and easier as time goes by! Do you like stamping nail art? What tips have you found helpful? What is your favorite image plates? I would love to hear from you! Leave me a comment here or use my contact card to get in touch!!


8/22/13

Adventures in Stamping

Hi guys! It's looking like it's going to be another polish-centric week on my blog! Never fear, I have a review and swatches of a new Elf eye shadow palette coming up as well as a few other things up my sleeve, so if you're a makeup lover and groan when I post back to back to back polish stuff, there's something coming for you quite soon!

But, today I want to talk to you guys about my very first experience with nail stamping. I have been a huge fan of a lot of nail blogs for years because I just love looking at the nail art and designs people come up with. Not being a huge nail art person myself (I don't have a steady hand) I would always appreciate the nail art, but never be able to duplicate it. So when I looked into stamping, and realized that it looked pretty easy, I decided to go ahead and give it a shot.

I went through and looked at a lot of different stamping sets. I did a lot of research on nail blogs and watched a ton of youtube videos on stamping and finally decided I was going to go for it. I started out as cheaply as possible. I figured I would buy the bare minimum of what I needed, and that way, if stamping wasn't for me, I wouldn't be out a ton of money. So I went on amazon and found just a basic stamping set from Konad. I purchased the Konad Double Side Stamp set, which came with a double sided stamp and a metal scraper.

http://www.amazon.com/gp/product/B002MZ8BK2/ref=oh_details_o01_s00_i00?ie=UTF8&psc=1
And then I just purchased a single image plate from amazon as well. I got the Konad Stamping image plate M3. Which has a couple of different heart images, some star images, some flowers and some bows.

http://www.amazon.com/gp/product/B001LTVF2G/ref=oh_details_o01_s00_i01?ie=UTF8&psc=1
All told I spent less than 10 dollars, which I was pleased with. At least if the stamping thing didn't work out, I wasn't out much!!

So the items arrived in a few days and I promptly put them in my nail polish drawer. I waited a few days before pulling them out and giving them a try. I'll admit I was intimidated. But at last, today I decided to give it a try. First I painted two coats of a cream finish nail polish on to act as my base. I used a Revlon top Speed Polish in the color stormy. no rhyme or reason other than I wanted something that would dry quickly and also, I have really been feeling more fall time appropriate polishes lately.


When I was sure that the polish was 100% dry (I waited about an hour, just to be extra sure!) I pulled out my stamping supplies!


I decided to try stamping with the Wet n Wild wild shine polish in the color French white creme. The first design I decided I try was the bows in the center of the plate. I applied the polish to the image, scraped off the excess using the metal scraper, and picked up the image with the small side of my stamper. The image transferred beautifully to the stamper. I picked up the image with a sort of rolling motion then I applied the image to my ring finger using the same rolling motion. Aha! the image transferred beautifully. Not perfect, mind you, but hey, that was pretty easy! So I decided to try another image. I applied the polish to the image of the stars, scraped off the excess, and stamped! Again, super easy! I went ahead and tried some other images on my various finger nails and they all transferred pretty well. There was a bit of a smudging incident on my pointer finger with the heart design. And I was off center here and there, but overall I couldn't get over how easy this was! Hey, I can do this! Sure, practice is going to make perfect, but this was a lot easier than what I thought it was going to be!!

Overall I am VERY pleased with the stamper that I purchased. I think it does the trick super easily! I might invest in a plastic scraper, though, since I hear that the metal ones can scratch the surface of the plates. I am definitely going to be purchasing more image plates. This was a great, basic plate to start out with, but I am already dreaming of other images, and maybe even full nail designs! I am super glad I read up on stamping before I started so I knew not to waste my money on the konad special polish. While I am sure it works wonders, I already have so many polishes, and the wet n wild wild shine polish worked perfectly for this! I am thrilled with the results of my first stamping session, and can't wait to keep experimenting!


10/29/12

Maybelline Baby Lips Limited edition shades

If you're a constant reader of my blog you know that I absolutely love the maybelline baby lips lip balms. Well, when I came across a display at my local walmart with new limited edition shades, I immediately jumped up and down and tossed em into my cart! There are three new limited edition shades and they are awesome! I thought I would share with you my thoughts on them, as well as a few quick swatches!


Unfortunately I did not remember t get a good photo of these beauties in their packaging before I excitedly tore into them, but you can see them here in this photo from one of my recent hauls. As you can see, these were sold in packs of two. There was also a third 2 pack, but it contained two of the shades from the permanent line, and since I already had them, it didn't make sense for me to buy the, The first pack of two came with two brand new limited edition shades in Coral Crush (A beautiful sheer true coral shade), and Pink Wink (a super super pale pink that is practically clear). The second two pack contained one permanent shade, peach kiss, which I already owned, but I purchased the pack anyway to get my hands on the limited edition shade, which is twinkle. Twinkle is a light pink shade that is so pretty!


L to R: Coral Crush, pink wink, twinkle
Like the permanent range of baby lips lip balms, these are super moisturizing. They glide on to the lips nice and smooth. They all smell great too. If you aren't a fan of scents in products you'll want to steer clear of these. Coral Crush smells like sweet candy, Twinkle smells just like bubble gum and pink wink has a fruity scent. Such yummy smells.

As far as pigmentation goes, these can be layered on for a deeper pigmentation, but they are all pretty sheer. twinkle is so light it basically is just sheer on my lips. Coral Crush and pink wink however have a nice pigmentation when applied in layers. The coral is by far my favorite. Just look at that gorgeous color!

L to R: Coral Crush, Pink Wink, twinkle
So overall, if you are a fan of the maybelline baby lips lip balms, I highly suggest running out and grabbing these limited edition shades if you haven't done so already. They are amazing, especially the shade coral crush. It's amazing! These two packs of lip balms retail for around 8 dollars. At 4 dollars a lip balm, that is a bit pricey, but these are definitely worth it in my opinion. Their fun packaging, great smell, wonderful pigmentation and super moisturizing qualities make them a must have item in my book!

Which color are you loving? Leave me a comment down below and let me know!

note: I originally mixed up pink wink and twinkle. It's fixed now, so the swatches you are seeing are labelled correctly now. Sorry for the mishap!

9/18/12

Elf HD Blushes: First Impressions and swatches


I have been eagerly awaiting the release of these HD blushes. Elf has been teasing me for a while now with photos of these upcoming products. And so as soon as they said they were available for purchase I jumped up and down like an excited little school girl and placed an order. I ALMOST ordered all 5. But, I was able to control myself and bought only 2 to start. That way if they turned out to be duds, I wouldn't be too disappointed. Well, I am disappointed that I did not buy all 5. I LOVE these.

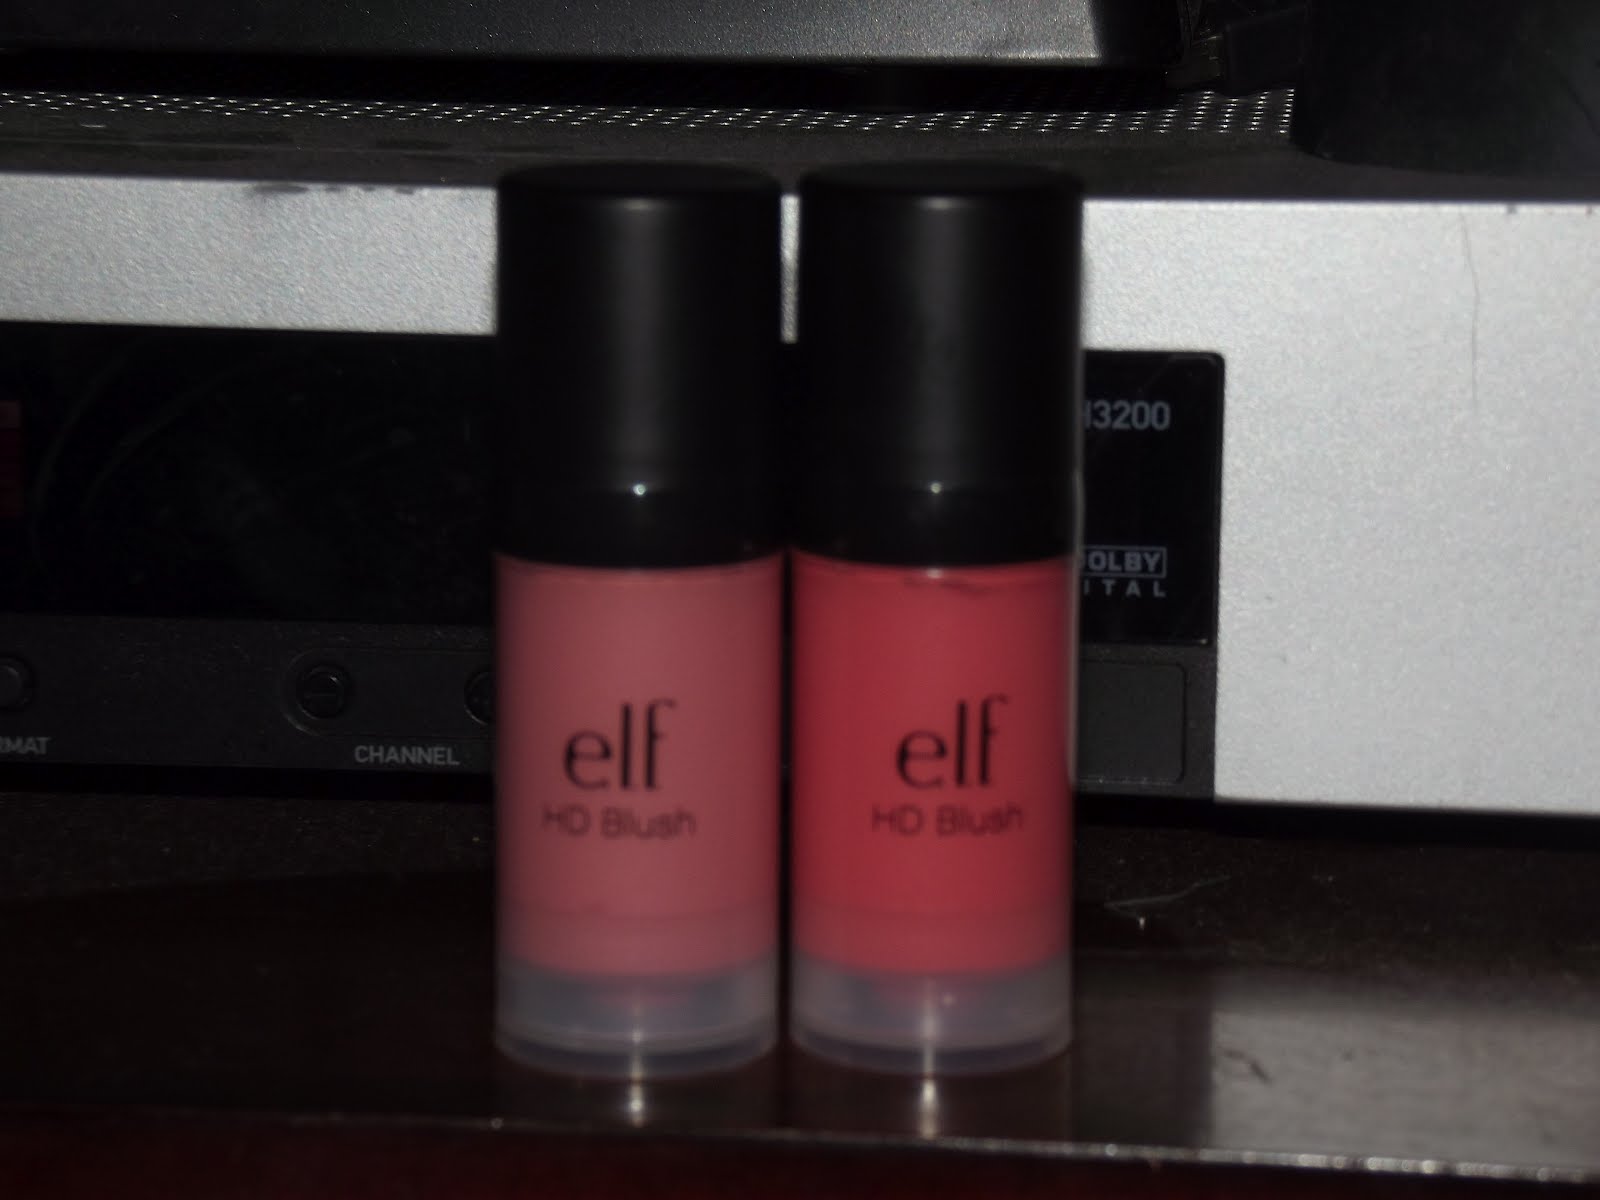
I bought the two lightest shades on the bunch. Headliner and Superstar.

Headliner is a light pink very natural blush. Superstar is a peachy pink blush that is a bit darker than Headliner, but still quite natural.

My first impression of these blushes when I opened my package was WOW those are tiny! They really are. The packaging on these is about as big around as the Elf all over color sticks, if you are familiar with those. And about as tall as a lipstick. And that's with the cap on. They are SMALL!


So at first glance I was pretty disappointed. I imagined them to be bigger. Closer to the size of, say, a foundation. But, don't let it's little size fool you. These blushes are amazing. The product is so pigmented that it literally takes the tiniest little drop of product per cheek. In fact, the first time I tried to swatch it, I used about a half a pump of product and it was enough to do my face and about 3 other faces! haha.

So after I washed off the mess I made with the way too much product swatches, I did the tiniest little dots of product to see how that would work.


Then I blended it out:

Headliner on the left, Superstar on the right

As you can see those little dots of product blended out to a beautiful natural flush of color. Obviously you could add more and build it up to whatever coverage you want. But, I just love this natural little flush of color.

Now, I haven't worn either of these blushes on my face yet, so I cannot comment on wear time. These swatches were done with my fingers, and these blushes blended out nicely that way. they didn't drag and the product did not build up in one spot. I think that they will blend nicely with a stipple brush as well. But I will have to comment on that when I do my full review later on. I just wanted to give you all my first impressions, as well as some swatches. All of the swatches of these products I have seen are big, thick goopy swatches, and I thought it might be helpful for you all to see what the product looked like completely blended.

Let me know if you have any question or comments, and be on the lookout for the full review on this product after I have been using it for a while!

LinkWithin

Related Posts Plugin for WordPress, Blogger...

Total Pageviews